English
- English
-
 שפה עברית
-
 繁体中文
-
 Latviešu
-
 беларускі
-
 Hrvatski
-
 lugha ya Kiswahili
-
 አማርኛ
-
 ქართული
-
 Hausa
-
 Zulu
-
 Հայերեն
-
 Igbo
-
 Yoruba
-
 Español
-
 Português
-
 русский
-
 Français
-
 日本語
-
 Deutsch
-
 tiếng Việt
-
 Italiano
-
 Nederlands
-
 ภาษาไทย
-
 Polski
-
 Svenska
-
 magyar
-
 Malay
-
 Dansk
-
 Suomi
-
 हिन्दी
-
 Pilipino
-
 Türkçe
-
 العربية
-
 Indonesia
-
 Norsk
-
 český
-
 ελληνικά
-
 український
-
 فارسی
-
 български
-
 Қазақша
-
 Azərbaycan
-
 Slovenský jazyk
-
 Lietuvos
-
 Eesti Keel
-
 Română
-
 Slovenski
-
 Srpski језик
-
 한국어


acrylic nail tools
The mistake most beginners make is buying tools one at a time. They buy a brush, then realize they need a file, then a dust brush, then a drill, then bits. Each purchase is made in isolation, and the result is a collection of tools that do not work together as a system. Acrylic nail work is not a list of individual tools. It is a sequence of stages, and each stage depends on the stage before it. The Acrylic Nail Tools from Shenzhen Ruina Optoelectronic Co.,Ltd are designed as components of that system, not as standalone products. This page explains how the tools fit together and what each one actually does.
The Three Stages of an Acrylic Service
Every acrylic service moves through three stages: preparation, application, and refinement. Each stage requires a different set of tools, and each set is built around the physical demands of that stage.
| Stage | What Happens |
|---|---|
| Preparation | Natural nail is cleaned, shaped, and prepped for adhesion |
| Application | Acrylic is mixed and applied to build the extension |
| Refinement | Acrylic is shaped, smoothed, and sealed |
A tool that works well in one stage may be completely wrong for another. A 240-grit file is essential for prep but useless for shaping a thick acrylic extension. A coarse carbide bit is essential for refinement but would destroy the natural nail if used during prep. The grit, the material, and the tool itself are all chosen to match the stage.
Preparation Tools: Setting the Foundation
Preparation determines whether the acrylic will bond to the natural nail and stay in place. Lifting and peeling are almost always prep problems, not application problems. The tools used in this stage are designed to create a clean, dry, slightly textured surface for the acrylic to grip.
- Nail clippers — trim the natural nail to the desired length before shaping.
- Cuticle pusher — gently pushes back the cuticle tissue from the nail plate. This creates a clean surface at the base of the nail where lifting often starts.
- Cuticle nipper — trims non-living cuticle tissue and hangnails. Used sparingly to avoid damaging the cuticle seal.
- 240-grit file — removes surface shine from the natural nail, creating a textured surface for adhesion.
- Buffing block — smooths the nail surface and removes ridges before primer application.
- Nail dehydrator — removes oil and moisture from the nail plate. This step is critical; acrylic does not bond to oily surfaces.
- Primer — applied after dehydrator to enhance adhesion and prevent lifting. Acid-free primer is the gentler option for beginners.[reference:0]
- Lint-free wipes — clean the nail surface and tools throughout the prep stage.
The prep tools are often overlooked because they do not produce visible results. But a nail that is not properly prepped will fail regardless of how well the acrylic is applied. If you are building a professional setup, the prep tools are not optional.
Application Tools: Building the Structure
The application stage is where the acrylic extension is actually created. The tools in this stage are designed to pick up, place, and shape the acrylic before it hardens.
- Acrylic brush — the single most important tool in the application stage. A Kolinsky sable brush is the standard for professional work. For beginners, a size 8 oval brush is the most versatile starting point; it offers a balance between control and product pickup.[reference:1] A size 6 brush is better for detailed work like smile lines and 3D design.[reference:2]
- Dappen dish — a small glass or ceramic dish that holds the monomer liquid during application. Glass is preferred because it does not react with the monomer.
- Monomer — the liquid component that activates the acrylic powder. EMA (ethyl methacrylate) monomer is the professional standard. MMA (methyl methacrylate) is not recommended due to health risks.[reference:3]
- Acrylic powder — the polymer component. Clear powder is used for building the structure, while colored powders (white, pink, natural beige) are used for the visible nail bed and tip.
- Nail forms or tips — forms are used for sculpting custom extensions; tips are glued to the natural nail for a faster application. Forms are the standard for professional sculpting.[reference:4]
- Nail glue — used only when applying tips. A strong adhesive specifically formulated for nail tips.
The brush determines how the acrylic is placed and shaped. A brush that loses its tip or splays out during application makes it nearly impossible to create a clean smile line or control the acrylic bead. This is why professional-grade brushes cost more than hobby brushes: the hair quality and shape retention directly affect the result.[reference:5]
Refinement Tools: Shaping and Finishing
After the acrylic has hardened, the refinement stage begins. This is where the extension is shaped, smoothed, and prepared for the top coat. The electric file is the primary tool in this stage, supported by hand files and buffers.
- Electric file (e-file) — the tool that shapes and refines the acrylic. A professional e-file runs from 5,000 to 35,000 RPM with smooth control across the range.[reference:6] The key specification is torque at low RPM; a file that stalls on thick acrylic will slow down the entire service.
- Carbide drill bits — used with the e-file for bulk acrylic removal and shaping. Medium and coarse carbide barrel bits are the standard for taking down thick product.
- Ceramic drill bits — finer grit for shaping and refining after bulk removal. Ceramic runs cooler than carbide and produces a smoother surface.
- Diamond drill bits — fine grit for cuticle area work and surface smoothing.
- 120-grit file — hand file used for shaping the acrylic extension after the bulk has been removed with the e-file.[reference:7]
- 180-grit file — refines the shape and smooths the surface.
- Buffer (100/180 grit) — removes file marks and prepares the surface for the top coat.[reference:8]
- Dust brush — removes filing dust from the nail and surrounding skin. A small but essential tool for a clean finish.[reference:9]
The electric file is the tool that separates professional acrylic work from hobby work. A file with proper torque control lets you shape the acrylic efficiently without applying excessive pressure. Files that lack low-end control are dangerous near the cuticle and produce inconsistent results.[reference:10] For technicians who work with acrylic daily, the Acrylic Nail Drill and a full set of Nail Drill Bits are the core of the refinement stage.
Why the Tools Work as a System, Not a Kit
A kit is a collection of items sold together. A system is a set of tools where each component is chosen to work with the others. The distinction matters because a kit can include the right number of tools but the wrong combination of grits, sizes, and motor specifications.
For example, a kit might include a size 10 acrylic brush (too large for a beginner), a 100-grit file (too coarse for refining), and an e-file with no low-end speed control (dangerous near the cuticle). Each tool exists in the kit, but they do not work together as a system.
A functional acrylic tool system includes:
- Prep: 240-grit file, cuticle pusher, dehydrator, primer, lint-free wipes
- Application: size 8 brush, dappen dish, monomer, powder, forms or tips
- Refinement: e-file with torque at low RPM, carbide and ceramic bits, 120 and 180-grit files, buffer, dust brush
If you are buying tools individually, the checklist above is a better guide than the contents of any kit. If you are buying a kit, compare its contents against the checklist to see what is actually included.
Professional vs Hobby: What Actually Changes
The difference between professional and hobby-grade acrylic tools is not about branding. It is about whether the tool can withstand continuous use without losing performance.
| Tool | Professional Grade |
|---|---|
| Electric file | 5,000–35,000 RPM with smooth control; maintains torque under load |
| Acrylic brush | Kolinsky hair; holds tip; snaps back after use |
| Drill bits | Precise fluting; stays sharp; consistent cutting |
| Files | Consistent grit; lasts through many clients |
| Tool | Hobby Grade |
|---|---|
| Electric file | Coarse speed steps; poor low-end control; seizes under load |
| Acrylic brush | Synthetic or low-quality hair; splays out; loses tip |
| Drill bits | Dull quickly; inconsistent cutting; generate heat |
| Files | Grit wears off quickly; loses cutting ability |
For a beginner, the electric file is the tool where the professional-versus-hobby distinction matters most. A hobby drill can be dangerous near the cuticle because it lacks fine speed control. A professional e-file with low-end control is safer and produces better results from the start.[reference:11]
If you are building a professional setup, the 35000RPM Electric Manicure Pedicure Machine and the Hot Sale RN-101 35000RPM Strong Nail Drill are examples of e-files designed for continuous professional acrylic work. For mobile technicians, the RN-808V3 Rechargeable 30000 Rpm Nail Drill offers cordless operation with comparable torque control.
Who This Acrylic Tool System Is For
- Beginners building a first acrylic setup — the system approach avoids buying tools that do not work together.
- Salon technicians expanding into acrylic services — the prep, application, and refinement categories cover the full service.
- Nail schools and training centers — students learn on a system where each tool has a defined role.
- Mobile technicians — a cordless e-file and rechargeable dust collector create a portable acrylic setup.
- Technicians who work with both acrylic and gel — the e-file, bits, and files in this system handle both materials.
Technical Details
| Product Name | Acrylic Nail Tools |
|---|---|
| Tool Categories | Prep tools, application tools, refinement tools |
| Prep Tools | 240-grit file, cuticle pusher, cuticle nipper, dehydrator, primer, buffing block, lint-free wipes |
| Application Tools | Acrylic brush (size 8 / size 6), dappen dish, monomer, acrylic powder, nail forms or tips |
| Refinement Tools | Electric file, carbide / ceramic / diamond bits, 120 and 180-grit files, buffer, dust brush |
| Electric File Speed | 0–35,000 RPM adjustable (varies by model) |
| Electric File Operation | Corded or cordless (varies by model) |
| Brush Type | Kolinsky sable or synthetic (varies by model) |
| Bit Material | Carbide, ceramic, diamond |
| Application | Acrylic, hard gel, polygel, gel polish |
| Warranty | 1 year (electric file) |
| Certification | CE, RoHS (customizable) |
FAQ
What is the most important tool in an acrylic nail setup?
The electric file, or e-file, is the tool that determines how efficiently you can shape and refine acrylic. A file with sufficient torque at low RPM lets you remove bulk product without stalling, which directly affects service time and surface quality. The acrylic brush is the second most important tool because it controls how the product is applied. Poor application cannot be fully corrected during filing.
Why are there so many different files and buffers?
Each grit serves a different stage of the service. A 240-grit file removes shine from the natural nail during prep. A 120-grit or 100-grit file shapes the acrylic after application. An 180-grit file refines the shape. A buffer smooths the surface and removes file marks. Using the wrong grit at the wrong stage either wastes time or damages the product. The grit progression is not arbitrary; it follows the physical needs of the material.
What size acrylic brush should a beginner start with?
A size 8 oval brush is the standard recommendation for beginners. It offers a balance between control and product pickup, making it easier to manage the acrylic bead. A size 6 brush is better for detailed work like smile lines and 3D design. A size 10 or larger is for technicians who do a lot of full-set sculpting and need to pick up more product per bead. Starting with size 8 and adding a size 6 for detail work covers most beginner needs.
Do I need a dust collector for acrylic nail work?
Yes, if you work with acrylic regularly. Filing acrylic produces fine dust that contains acrylic particles, gel residue, and natural nail dust. Without extraction, this dust settles on the workspace and becomes airborne. A dust collector captures the particles at the source, which keeps the workstation cleaner and reduces inhalation exposure. For mobile technicians, the Rechargeable Nail Dust Collector Fan With Filter 40w removes the need for a nearby outlet.
What is the difference between a cuticle pusher and a cuticle nipper?
A cuticle pusher is used to gently push back the cuticle tissue from the nail plate. A cuticle nipper is used to trim excess cuticle skin or hangnails. The pusher is used first, during prep. The nipper is used sparingly, only on non-living tissue that needs removal. Overusing the nipper can damage the cuticle seal and cause lifting.
Can I use the same electric file for acrylic and gel nails?
Yes. An electric file with adjustable speed control handles both acrylic and gel work. The difference is in the bit selection and the speed used. Acrylic removal uses carbide bits at low to mid RPM with high torque. Gel removal uses finer bits at lower speeds. A file that maintains torque at low RPM is more versatile across both materials.
What grit file should I use to shape acrylic?
After applying and curing the acrylic, a 120-grit file is used to bring down the length and rough-shape the extension. A 180-grit file is then used to refine the shape and smooth the surface. A 240-grit file or a buffer is used for final smoothing before the top coat. Using a grit that is too coarse at the refining stage leaves deep scratches that are difficult to remove.
Do I need different brushes for different acrylic techniques?
Not necessarily different brushes, but different sizes for different tasks. A size 8 oval brush handles full-set application and general sculpting. A size 6 brush is useful for smile lines, cuticle area detailing, and 3D design. Technicians who do a lot of 3D work often keep a separate brush for design to avoid monomer contamination from color powder.
What tools are needed for acrylic nail removal?
Acrylic removal uses an electric file with a coarse carbide bit to take down the bulk of the product, followed by soaking in pure acetone to soften the remaining acrylic. A cuticle pusher or orange stick is used to gently scrape away softened product. A 240-grit file or buffer smooths the natural nail afterward. Some technicians also use a nail tip cutter to shorten the length before filing.
How do I know if my tools are professional grade or hobby grade?
Look at the electric file first. Professional e-files run from 5,000 to 35,000 RPM with smooth control across the range. Hobby drills jump in coarse steps or have poor low-end control, which is dangerous near the cuticle. Professional files also maintain torque under load; hobby files seize or slow down when working on thick acrylic. For brushes, professional Kolinsky brushes hold their shape and snap back after use. Hobby brushes splay out and lose their tip. If you need guidance on a specific tool, please contact us.
Related Products
- Acrylic Nail Drill — e-file with torque at low RPM for acrylic shaping and removal.
- Acrylic Nail Drill Kit With Everything — complete drill kit with bits and accessories.
- Nail Drill Bits — carbide, ceramic and diamond bits for acrylic and gel work.
- Rainbow Carbide Nail Drill Bits Tip — carbide bits for bulk acrylic removal.
- Ceramic Nail Drill Bits Tips For Natural Nails — ceramic bits for refining and surface work.
- 35000RPM Electric Manicure Pedicure Machine — corded e-file for continuous professional use.
- Hot Sale RN-101 35000RPM Strong Nail Drill — strong corded drill for thick acrylic removal.
- RN-808V3 Rechargeable 30000 Rpm Nail Drill — cordless e-file for mobile acrylic work.
- Rechargeable Nail Dust Collector Fan With Filter 40w — cordless dust extraction for acrylic filing.
- Nail Tool Sterilizer — for hygiene between clients.
- Professional Manicure Armrest — for client comfort during longer acrylic services.
For wholesale pricing, sample requests, or OEM inquiries, please send us an inquiry. Our team usually responds within 24 hours on business days.
Related Products


Hot Products

Nail Dryer Lamp 60w
Nail Dryer Lamp 60w which is sold hot in Amazon.com is specially designed for nails and can be used on the most dry gels to provide excellent drying effect not only for nails but also for toenails.high power.we are professional nail tool supplier,always provide factory price ,high quality product, Most superior service .please send message to contact us to OEM&ODM.
Nail Drill Set Electric File Professional 65w 35000rpm
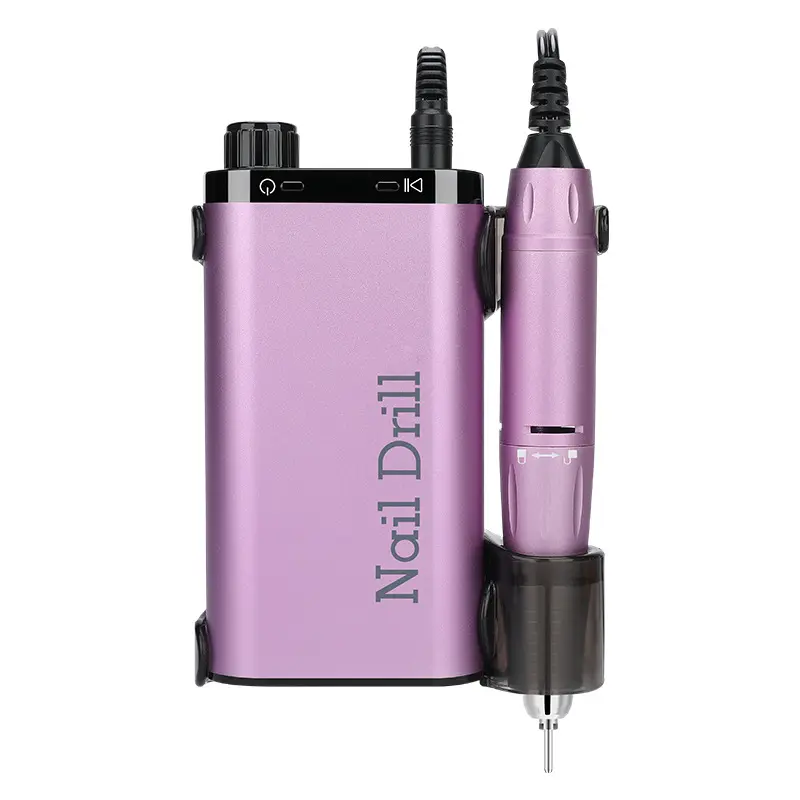
This Nail Drill Set Electric File Professional 65w 35000rpm is New Style Recargable Nail Art Drill Machine Set 30000rpm Manicure Machine For Nail Salon,it is very easy to use. You can realize what you want by pressing or rotating the main controller.It's perfect for nail salon, beauty parlors or home use.Low motor temperature rise, low energy consumption, low noise and no vibration.High reliability with longer service life.Automatic start & stop control and smart protection device.High quality.We are factory wholesale,Customers always want to order this Powerful Electric Low Noise Sander Drill Nails
Clip-on Photography Lighting
As a professional manufacturer, we can provide you with customised clip-on photography lighting. We guarantee the highest quality after-sales service and punctual delivery. This product features a small mirror for 180-degree all-round illumination with no blind spots, delivering uniform, soft and comfortable light that remains non-glaring even during prolonged use.
High-quality UV gel nail drying lamp
As a professional manufacturer, we are committed to providing you with customized High-quality UV gel nail drying lamp. We offer top-notch after-sales service and timely delivery. This product uses a 72W high-power light source for rapid drying, achieving efficient drying in just 5 seconds, completely eliminating the need for 6-minute drying times. The leak-proof base plate is removable, and the hand/foot switch design ensures convenient and hygienic use.
RN-808V3 Rechargeable 30000 Rpm Nail Drill
Ruina Optoelectronic is a professional RN-808V3 Rechargeable 30000 Rpm Nail Drill manufacturers and suppliers in China. Besides, Our factory offers customized RN-808V3 Rechargeable 30000 Rpm Nail Drill made in China with competitive price and good quality. We have nail art kits in stock, welcome to place an order.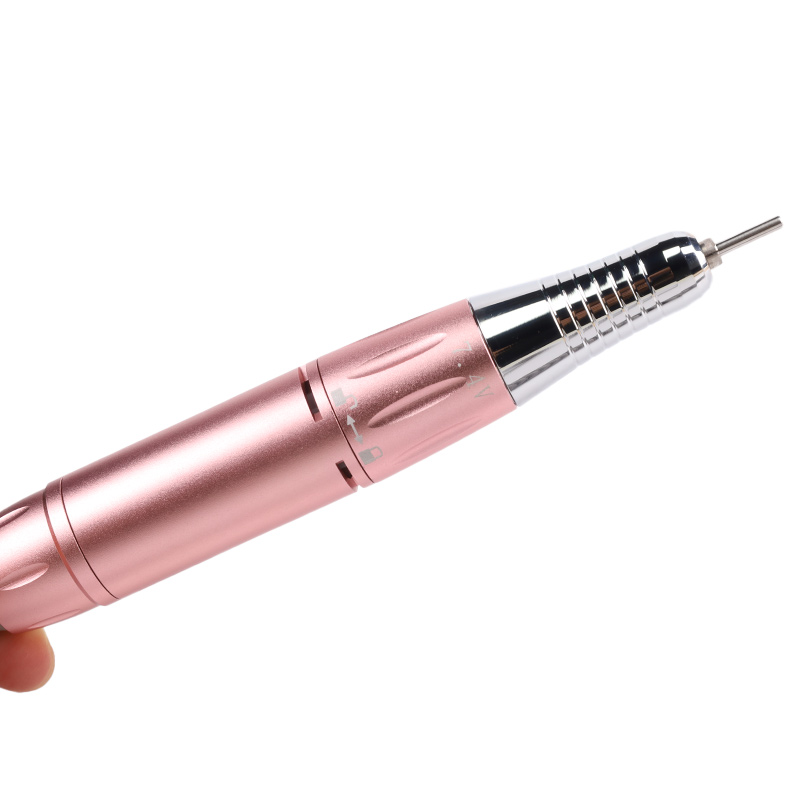
Lightweight Quiet Nail Buffer Manicure Home Device
Professional suppliers and home beauty users choose RUINA Lightweight Quiet Nail Buffer Manicure Home Device. Gentle high-speed rotation buffs away ridges and dullness—revealing a natural glass-like gloss without heat or vibration. Sound-dampening motor, ergonomic grip, and easy-to-clean cushion pads ensure lasting hygiene and comfort. Ideal for home users, busy individuals, or anyone seeking a peaceful spa-like experience. No noise, no bulk—just calm, effective buffing. RUINA—tranquil shine, right at home.
- Related Blog
- Reviews

Send Inquiry



X
We use cookies to offer you a better browsing experience, analyze site traffic and personalize content. By using this site, you agree to our use of cookies.
Privacy Policy